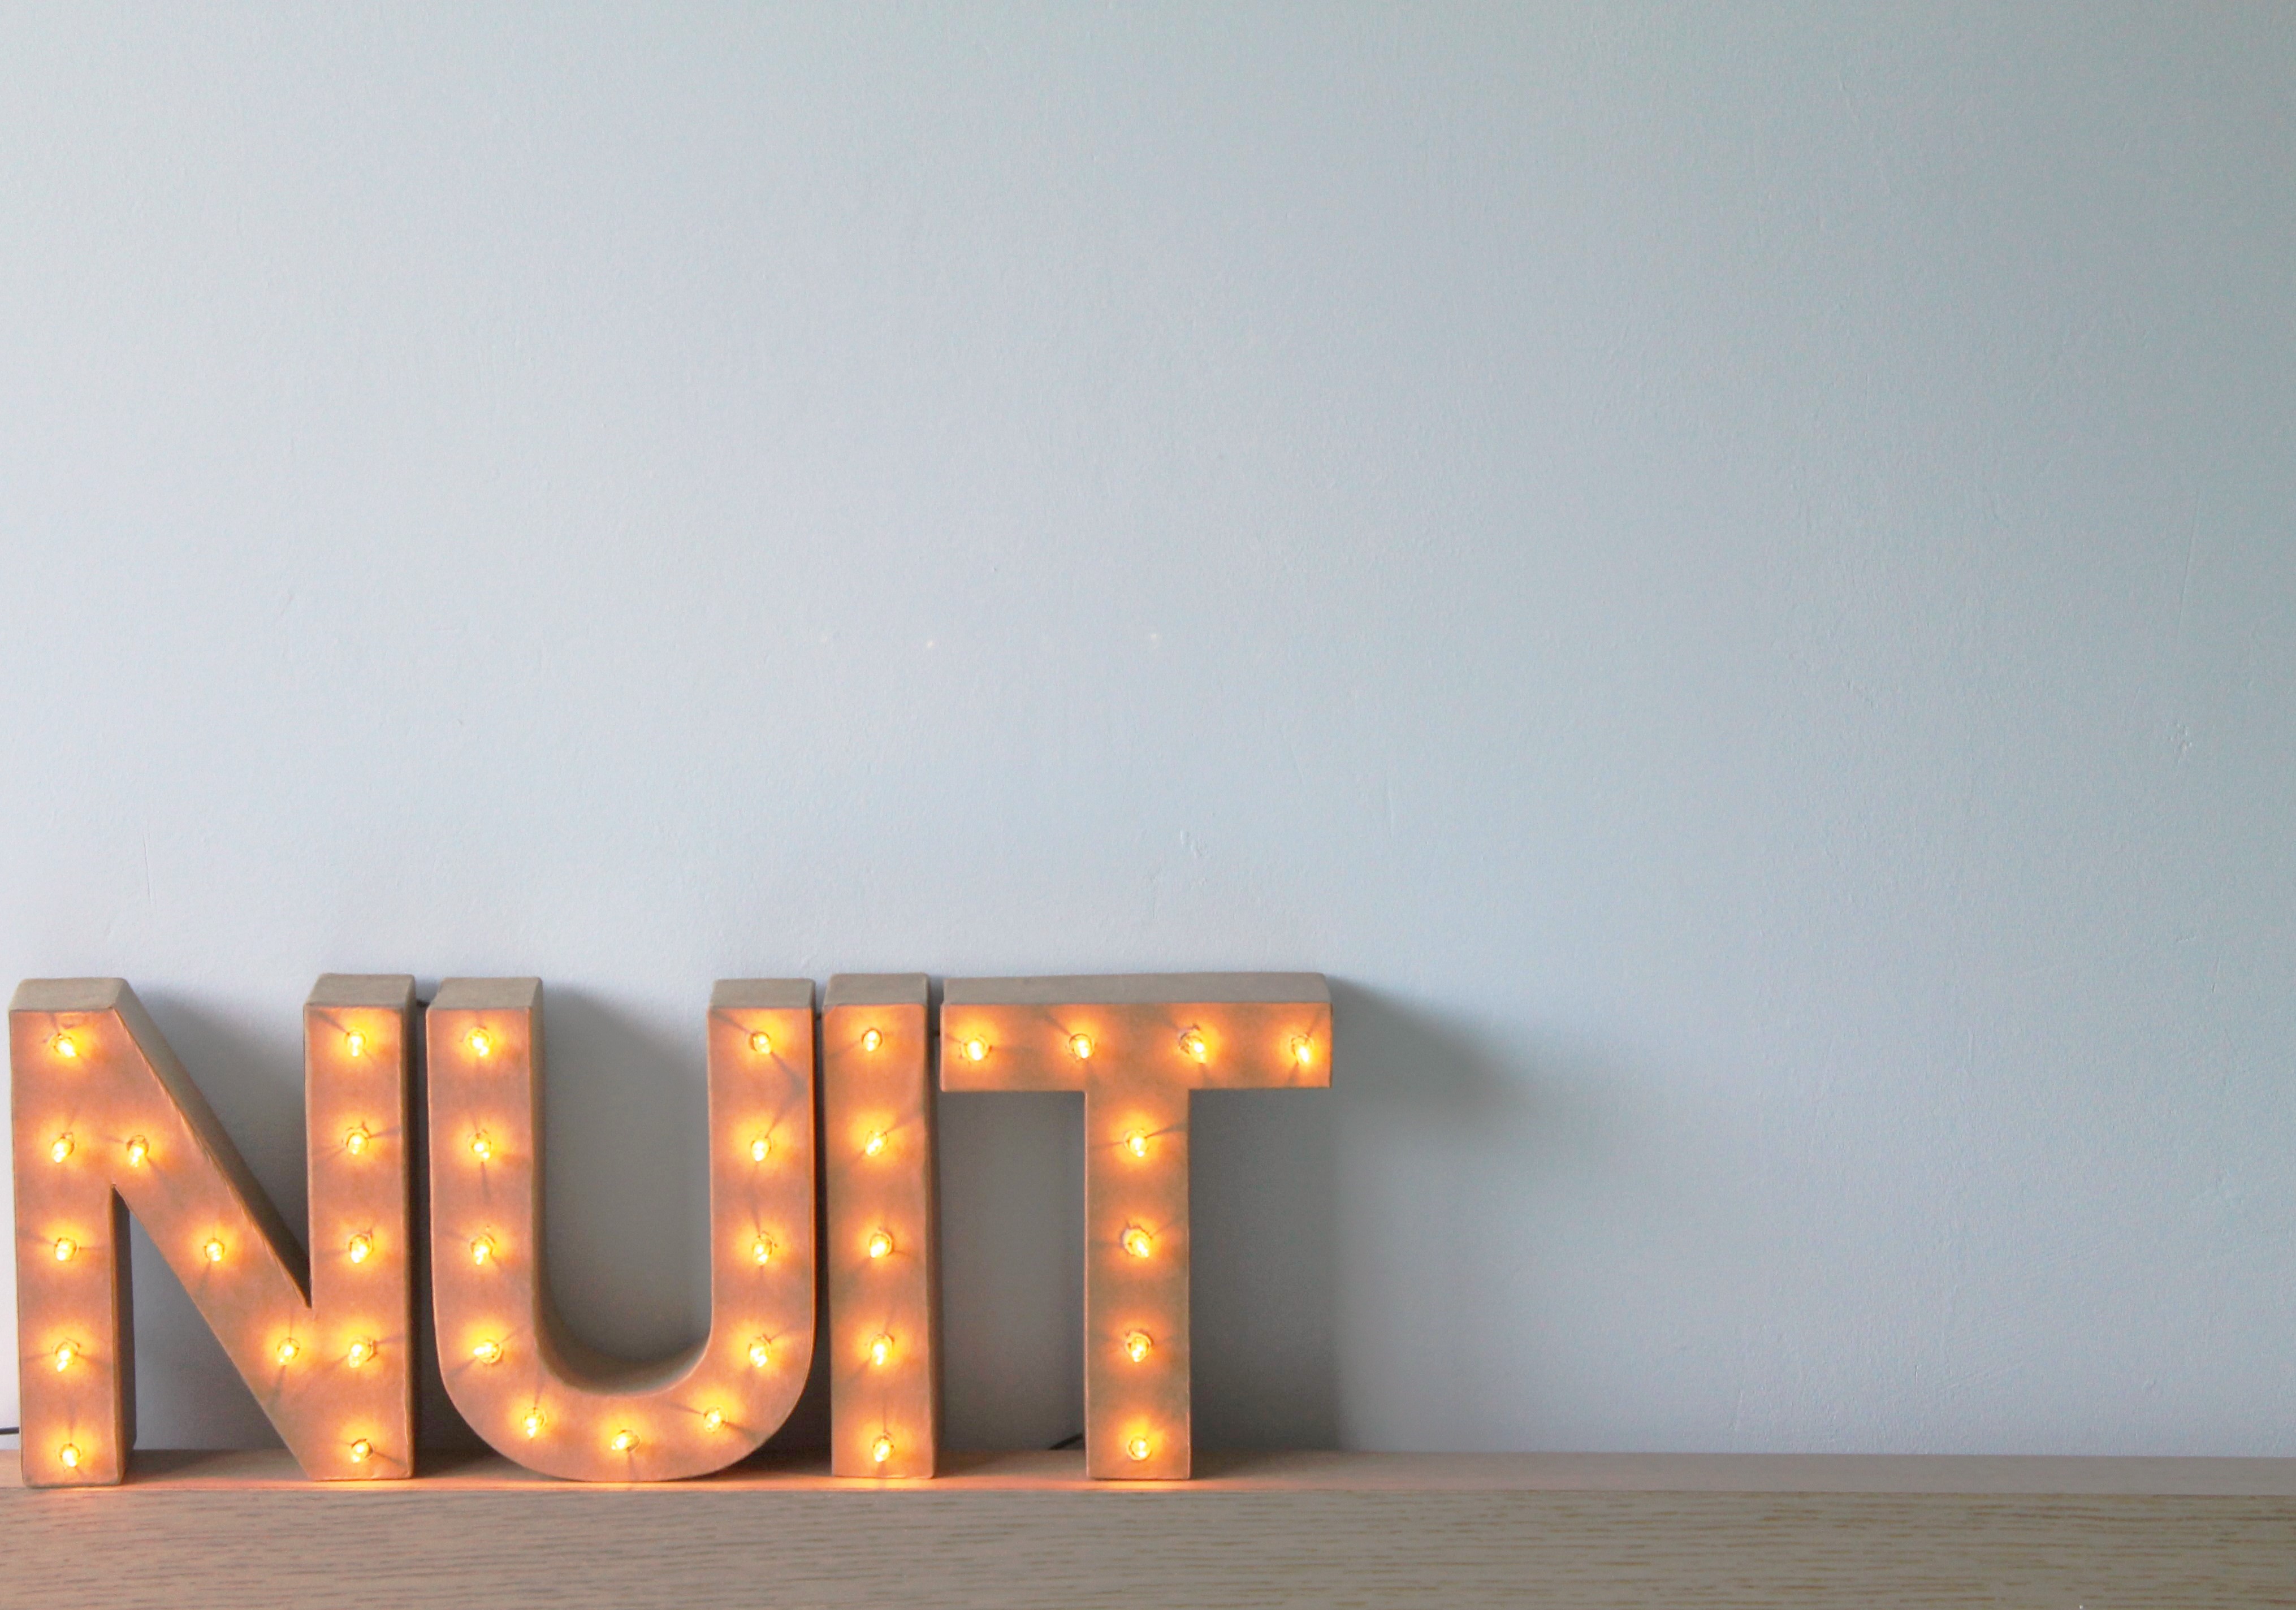
I’ve been seeing beautiful marquee letters inspired lamps all over Pinterest for a while, and decided it was time to try my hand at one. Since moving in with the boyfriend I’ve been using the globe that was a birthday present long ago in what probably were my early teens (or even before that?). It is still one of my favorite objects, but I strained my eyes trying to read by the little light it gives. And what use is a nightlight you can’t comfortably read by?
It’s a fine line though. You want to be able to discern the seperate letters in the book you’re reading, but at the same time the light should be low enough to let you slowly drift towards sleep. So instead of the big bright lights that are common for marquee letters, I decided to use Christmas lights instead. Well, and I had them on hand. That helped too.
Because of the lenght of the wire of lights that I had, and because I didn’t want too many letters in my lamp for aesthetic reasons, I went with the word nuit, meaning night in French. When choosing a word, make sure to calculate how many lights go in each letter and leave some room to reach the nearest electrical outlet. I left a couple of lights myself to hang between the letters and the outlet like this:
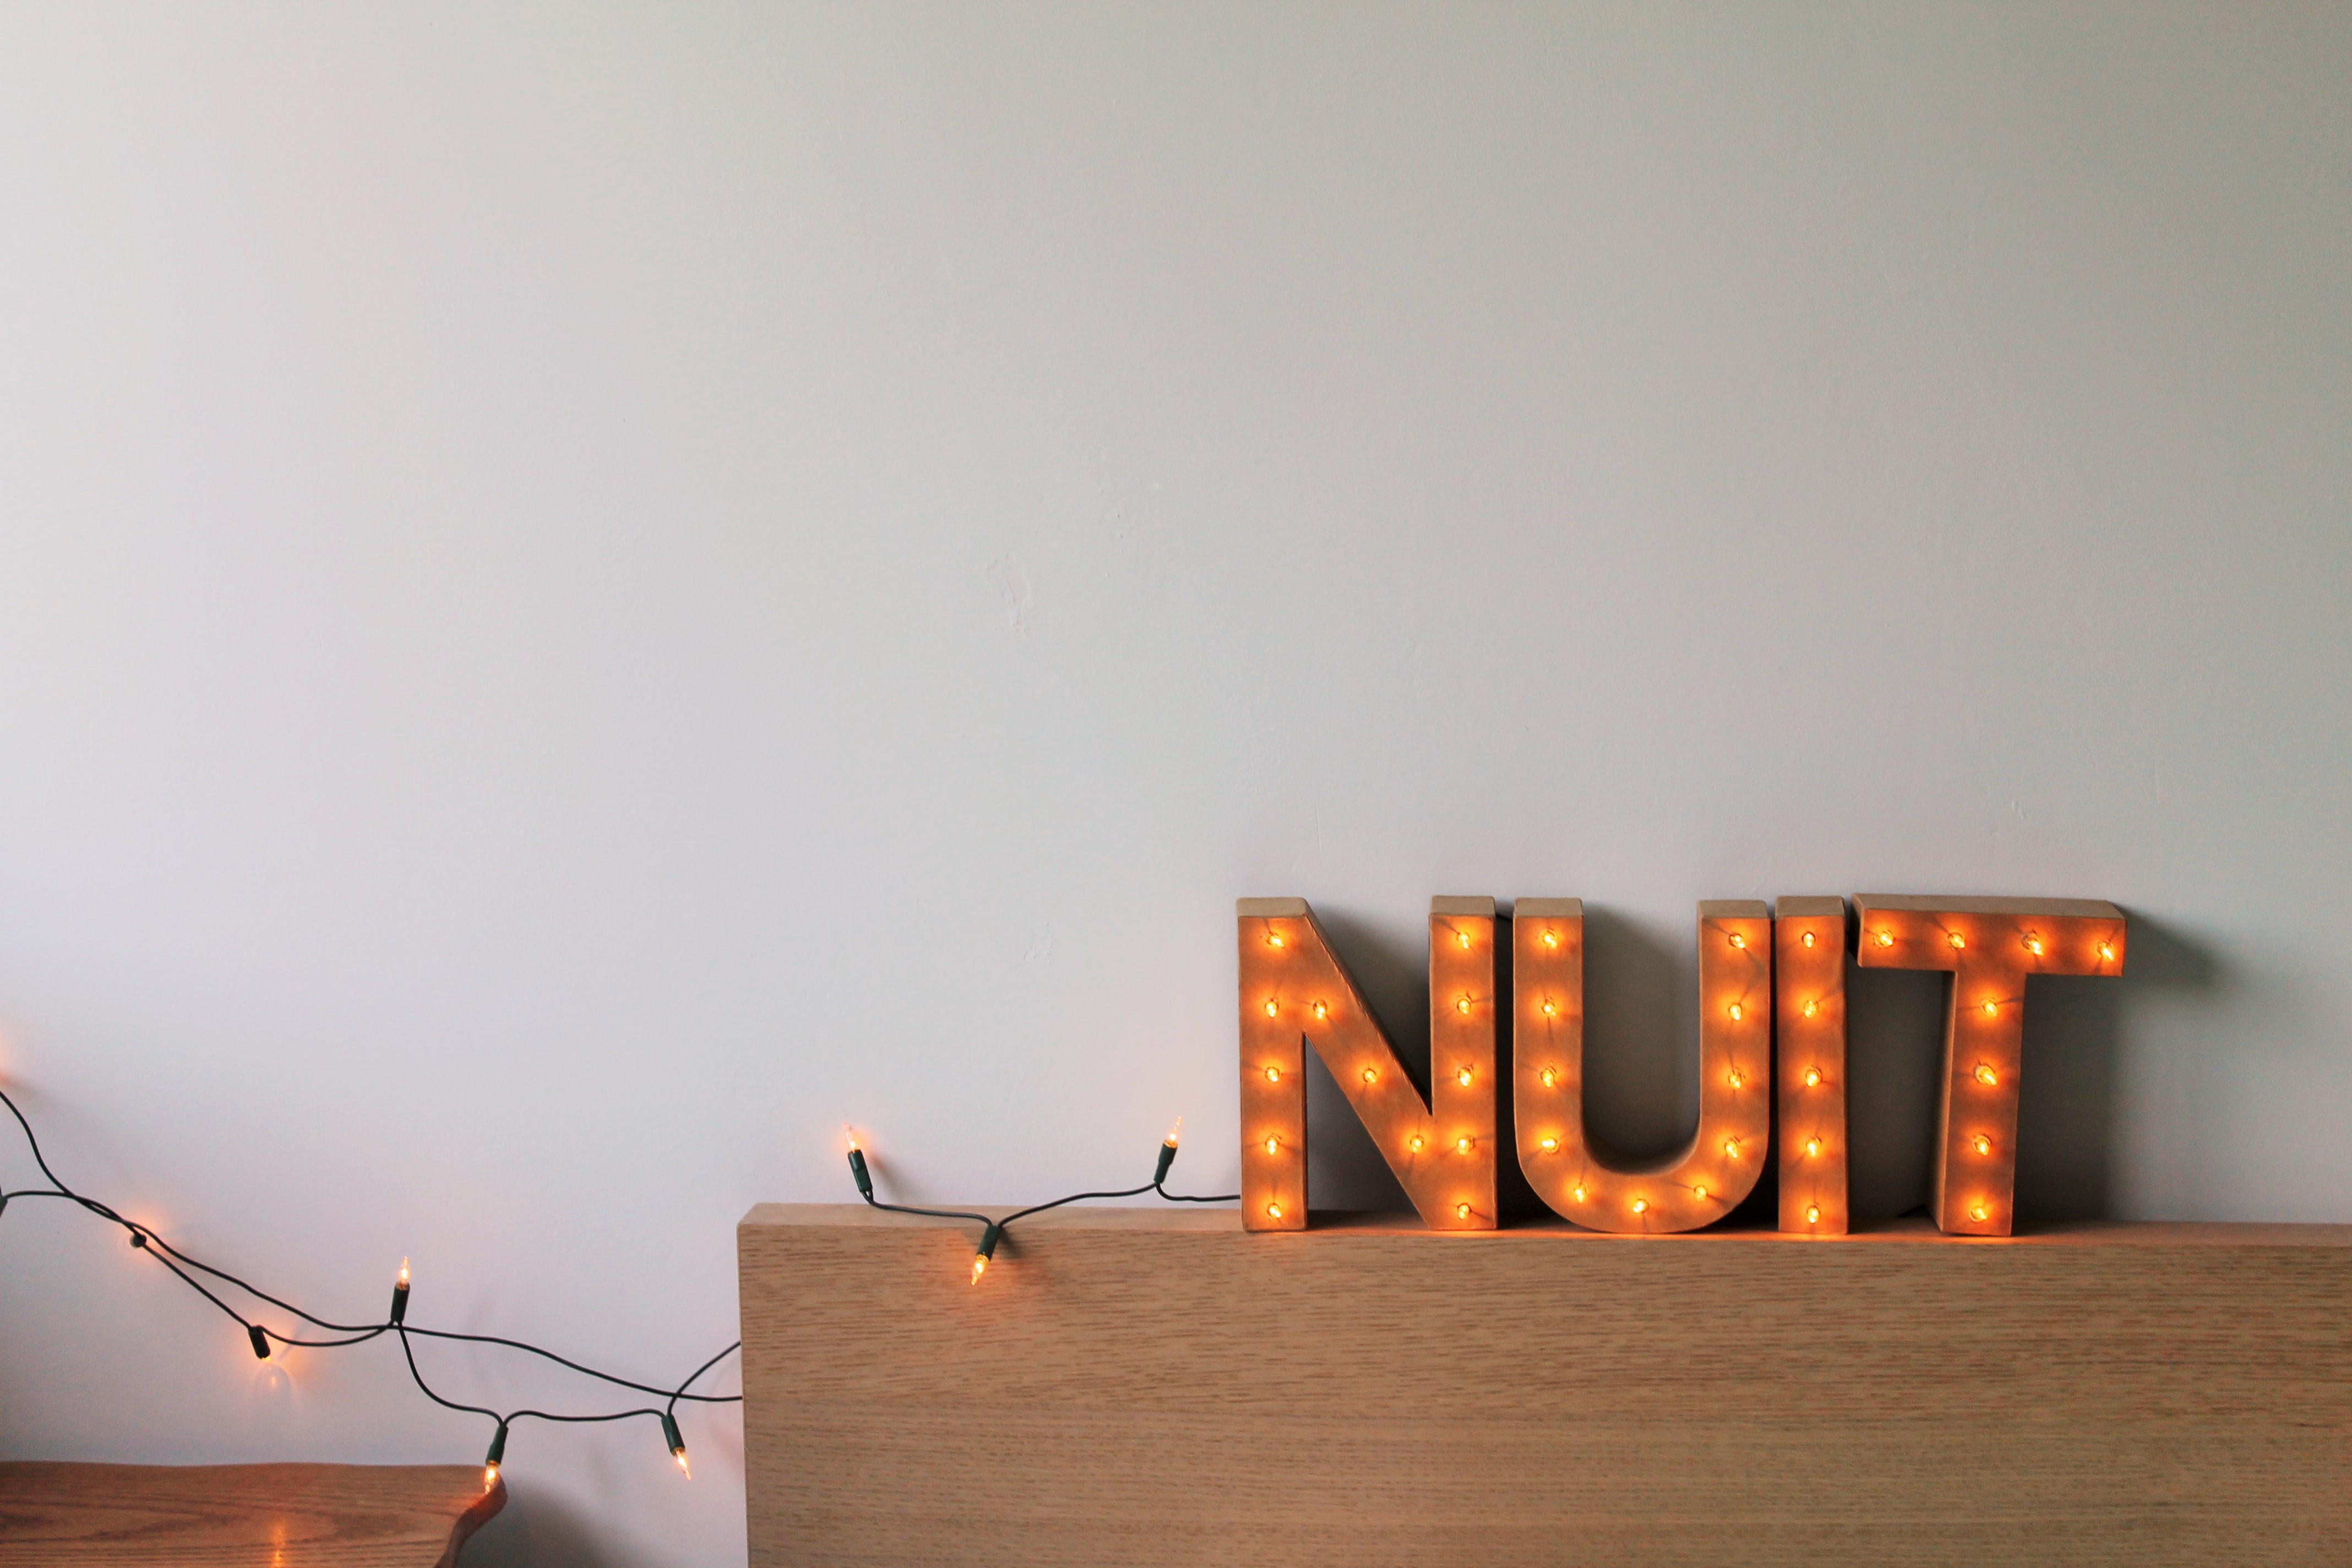
Not the neatest solution perhaps, but my outlet for some reason is placed in the middle of the wall. Lets just say that this is a great way to combine marquee letters with the fairy lights trend, okay? If you don’t like this, then try using an extension cord or cut open the wire cover and add some extra length so you can hide the cord behind the bed or on the floor, but I was okay with it like this. It would have been even better if the outlet was on the other side of the bed, so that I could have pinned the extra lights to the wall pretending to be little stars trailing upwards to the sky, but life isn’t always perfect.
My letters are cardboard ones from Xenos. First I cut out their backs, and carefully placed little dots where I wanted my lights to be. Then I cut out the dots with a sharp knife, making sure they were big enough to let the green plastic part of the Christmas lights through, instead of just the lamps (which get quite hot).

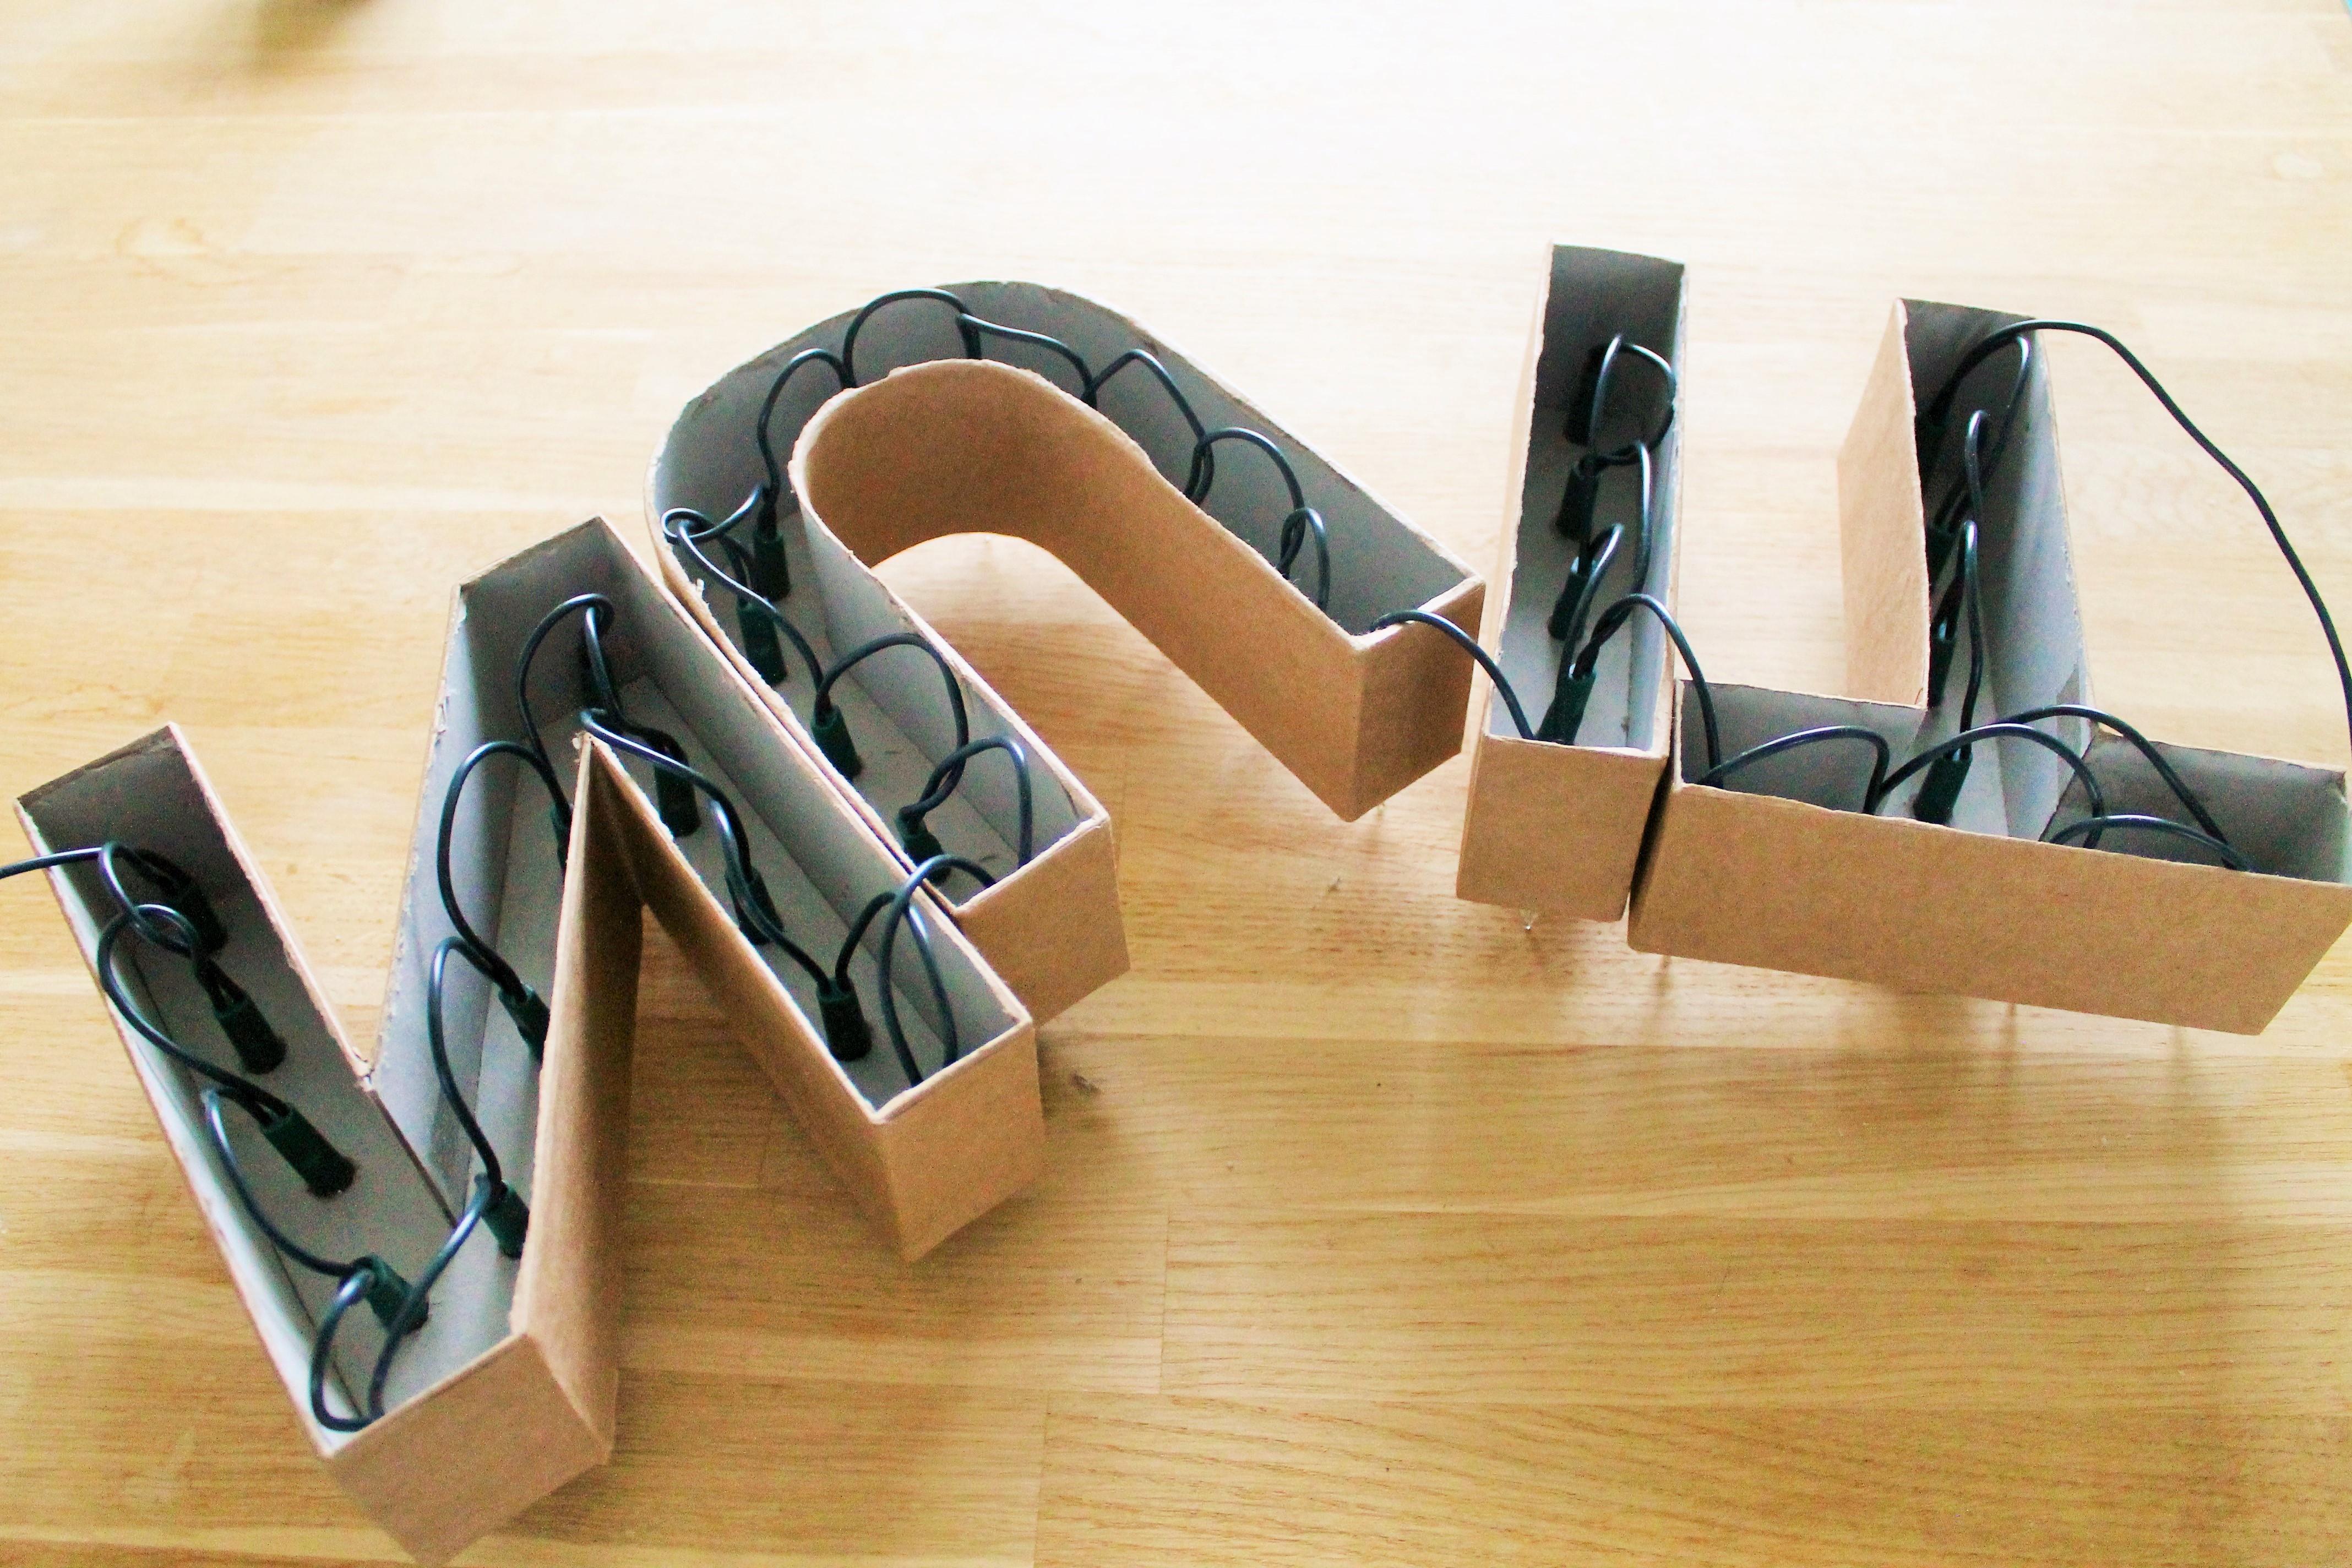
After that, it’s just the simple task of pushing the lights through from the back. And when I say simple, I mean actually-not-so-simple. This step took a bit more time than expected, with the letters being rather narrow but deep. There is little space to move your hands, but it is definitely doable. And once you’re done with this part, you are actually DONE. You have just made a super cute lamp that everyone will ask you about. And with the letters costing me a little under €2 each, and the Christmas lights having been purchased in last year’s sale for €2.5, this lamp only cost me about €10 to make. How cool is that?


2 Comments
That’s really cute! And what a great excuse to use something Christmas-related 😀
Thanks Claire! And fall is officially here, I’m sure that means the Christmas season has started, no? 😉